JA4. Textured Cube
Statement
Scenario: You are a designer specializing in creating wall textures for children. You have created four textures that can be used for painting a wall. As the next step, you are expected to give a presentation of your textures for a 5-year-old child
Create a scene that displays a 3D object with the appropriate light source. The four textures created by you should be displayed on the different faces of the 3D object. The 3D object should keep on rotating, to make all four textures visible, one texture at a time.
Instructions for the assignment:
- Select an object of your choice from Three.js library.
- Select any images that you would like for the texture, but make sure they are suitable for 5-year-old child.
- Auto rotate the object, and provide mechanism to control the rotation of the object with mouse clicks/arrow keys.
- The 3D object must rotate clockwise.
Answer
Introduction
- Live demo: https://ahmad-ali14.github.io/AY2025-T2-CS4406/unit4/
- Source code: https://github.com/ahmad-ali14/AY2025-T2-CS4406/blob/main/src/unit4/code.ts
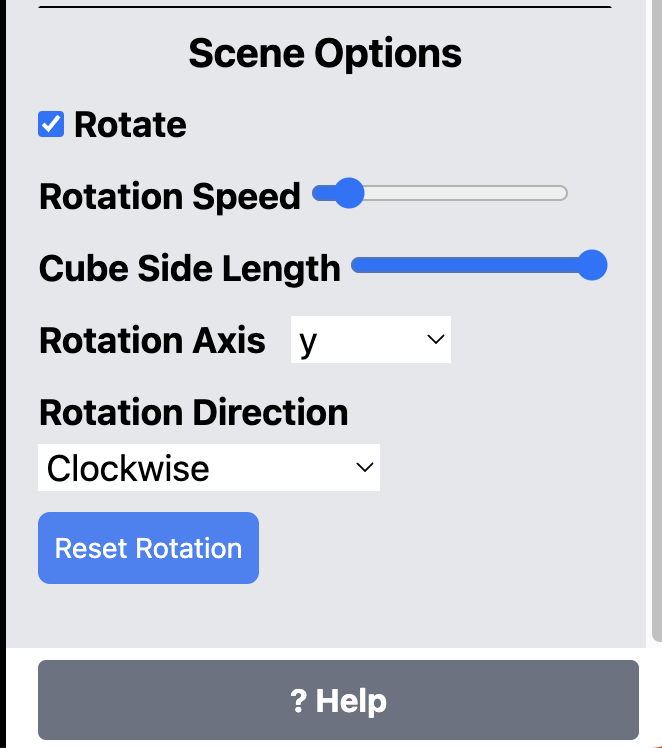
For this assignment I chose to use a cube as the 3D object. I have attached 4 images to the sides, left the top green and the bottom red. The cube is rotating clockwise and the user can control the rotation using Options Panel at the right side of the screen.
The Orbit controls are activated on the scene, so the user can rotate the camera around the scene using mouse movements (while holding the left mouse button) and mouse wheel to zoom in and out. The user can also control the rotation speed and rotation axis; start/stop the rotation and reset the rotation to the initial state (more details in the Options Panel section).
Screenshots
Images 1, 2, and 3 show the cube with at different rotations. Notice the Options Panel on the right side of the screen (Images 4, 5, and 6 below).
| Image 1: Screenshot of the scene |
|---|
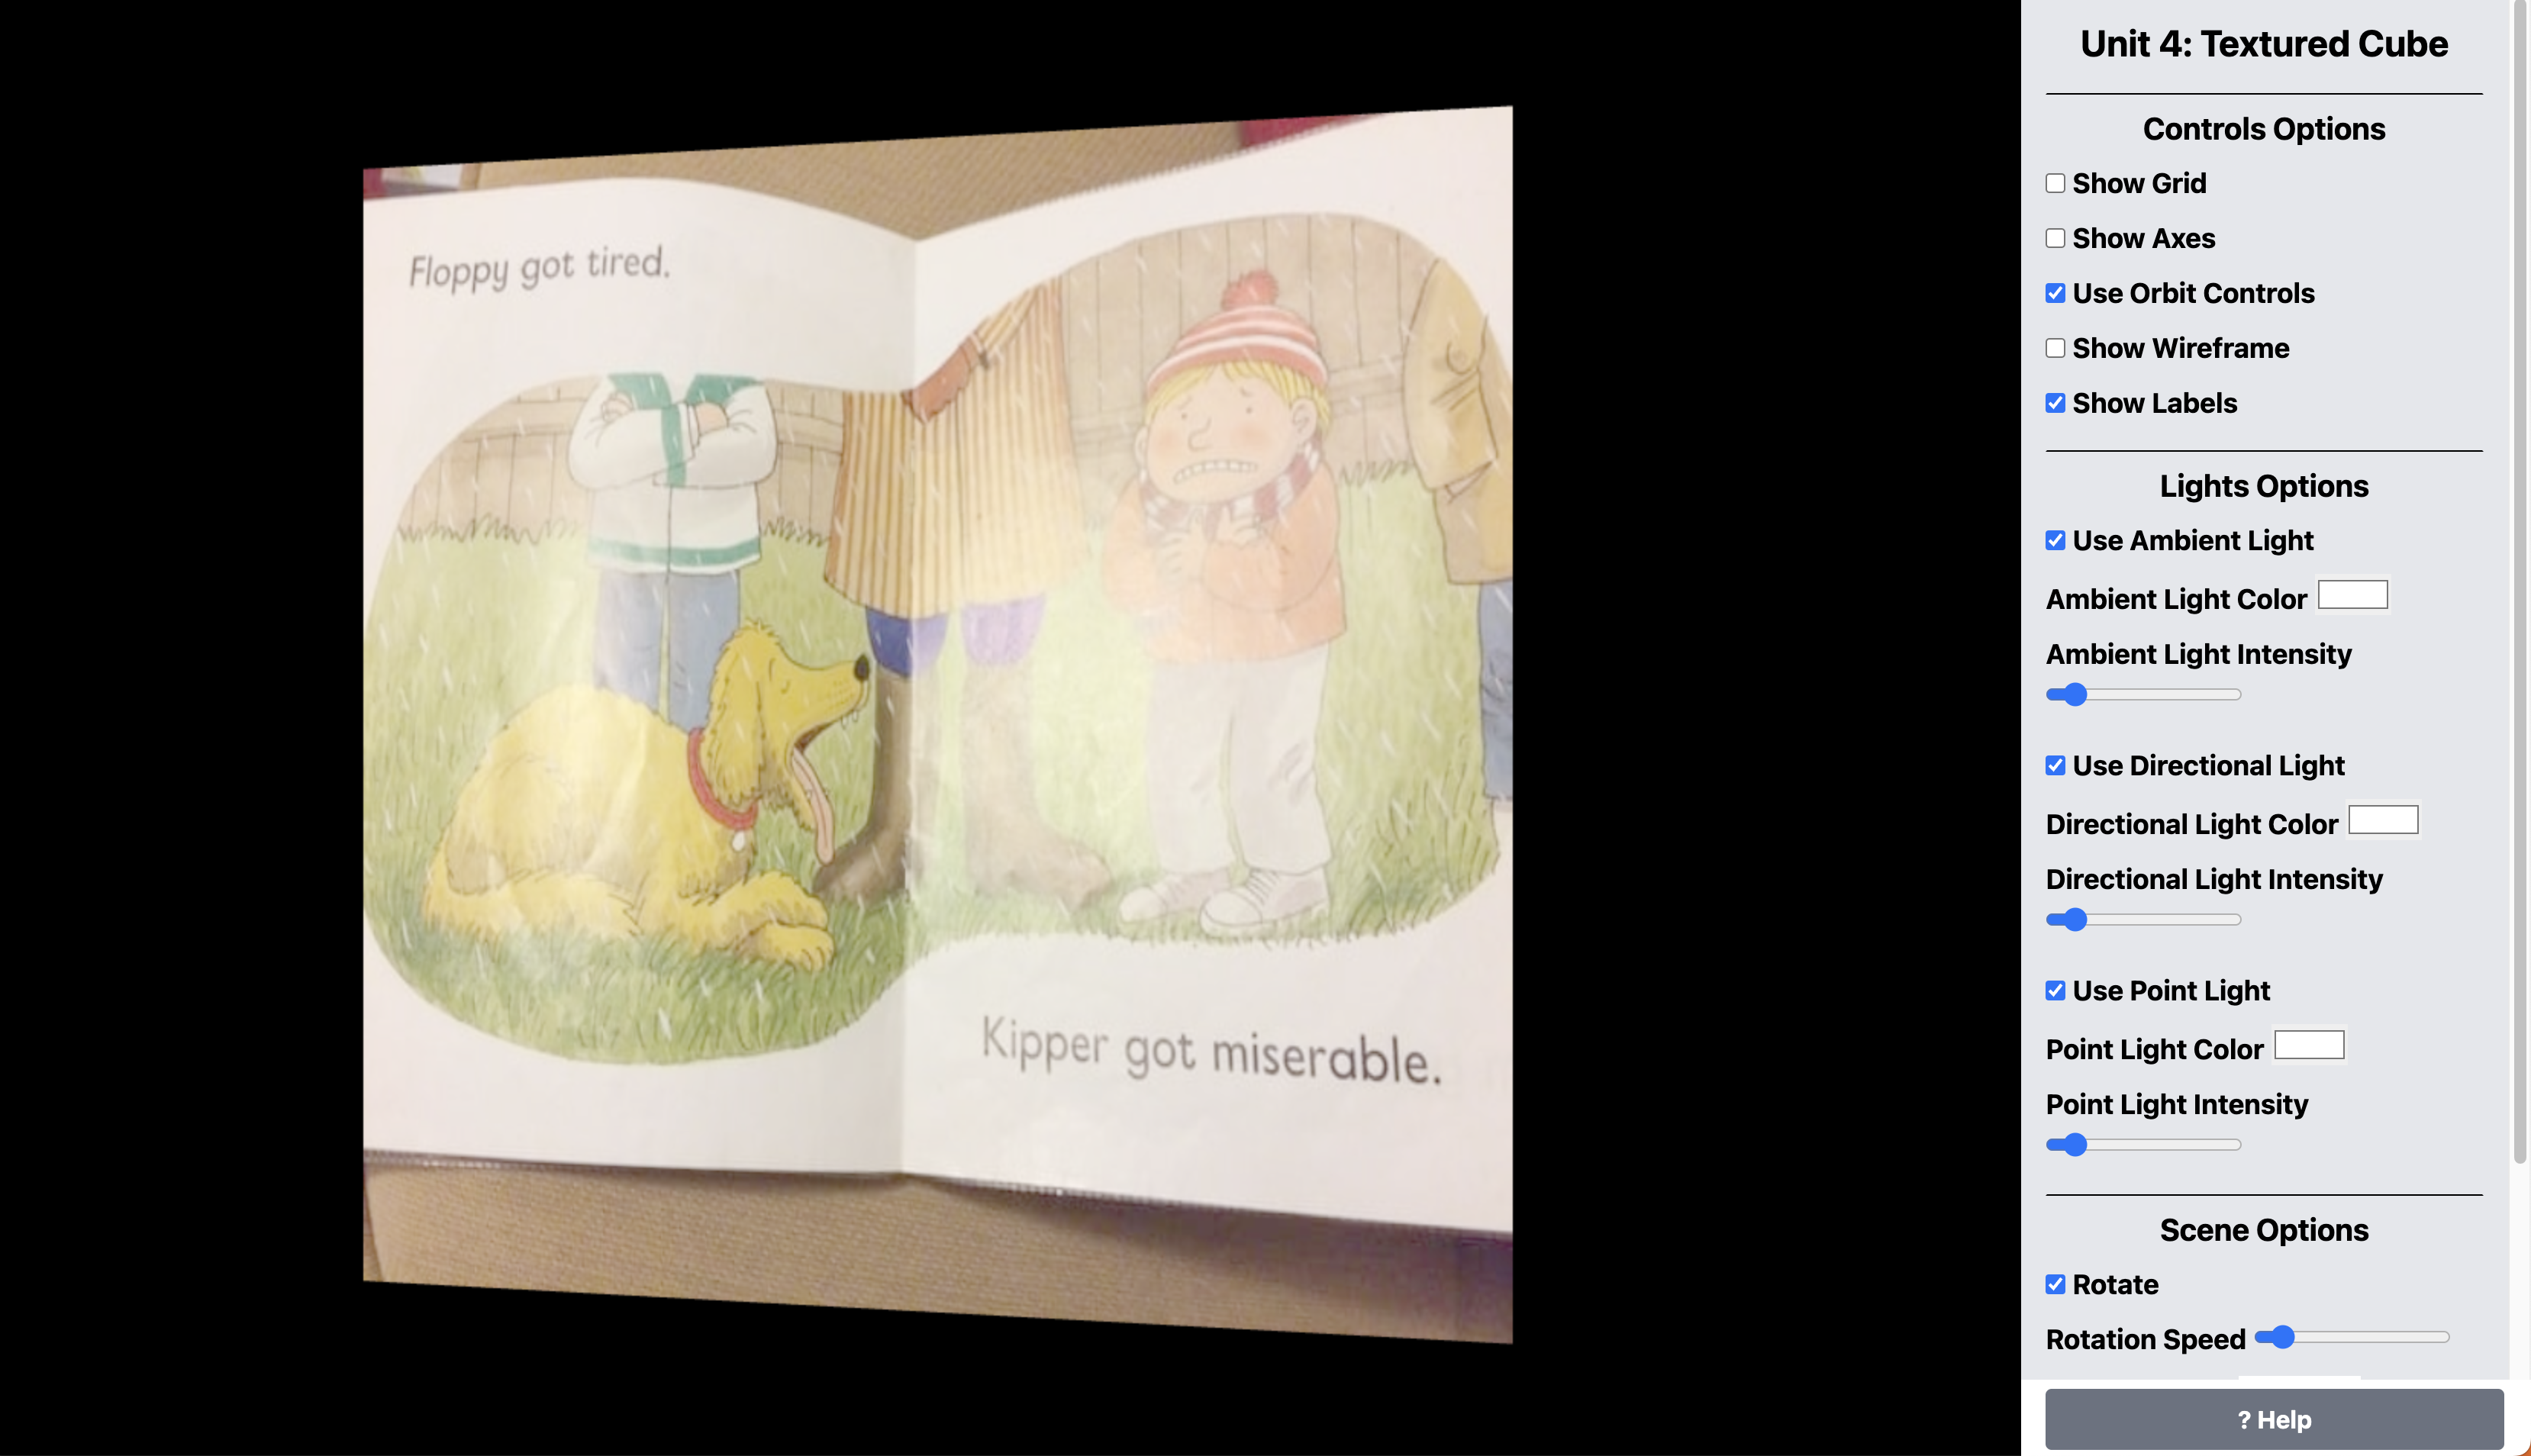 |
| Image 2: screenshot of the scene |
|---|
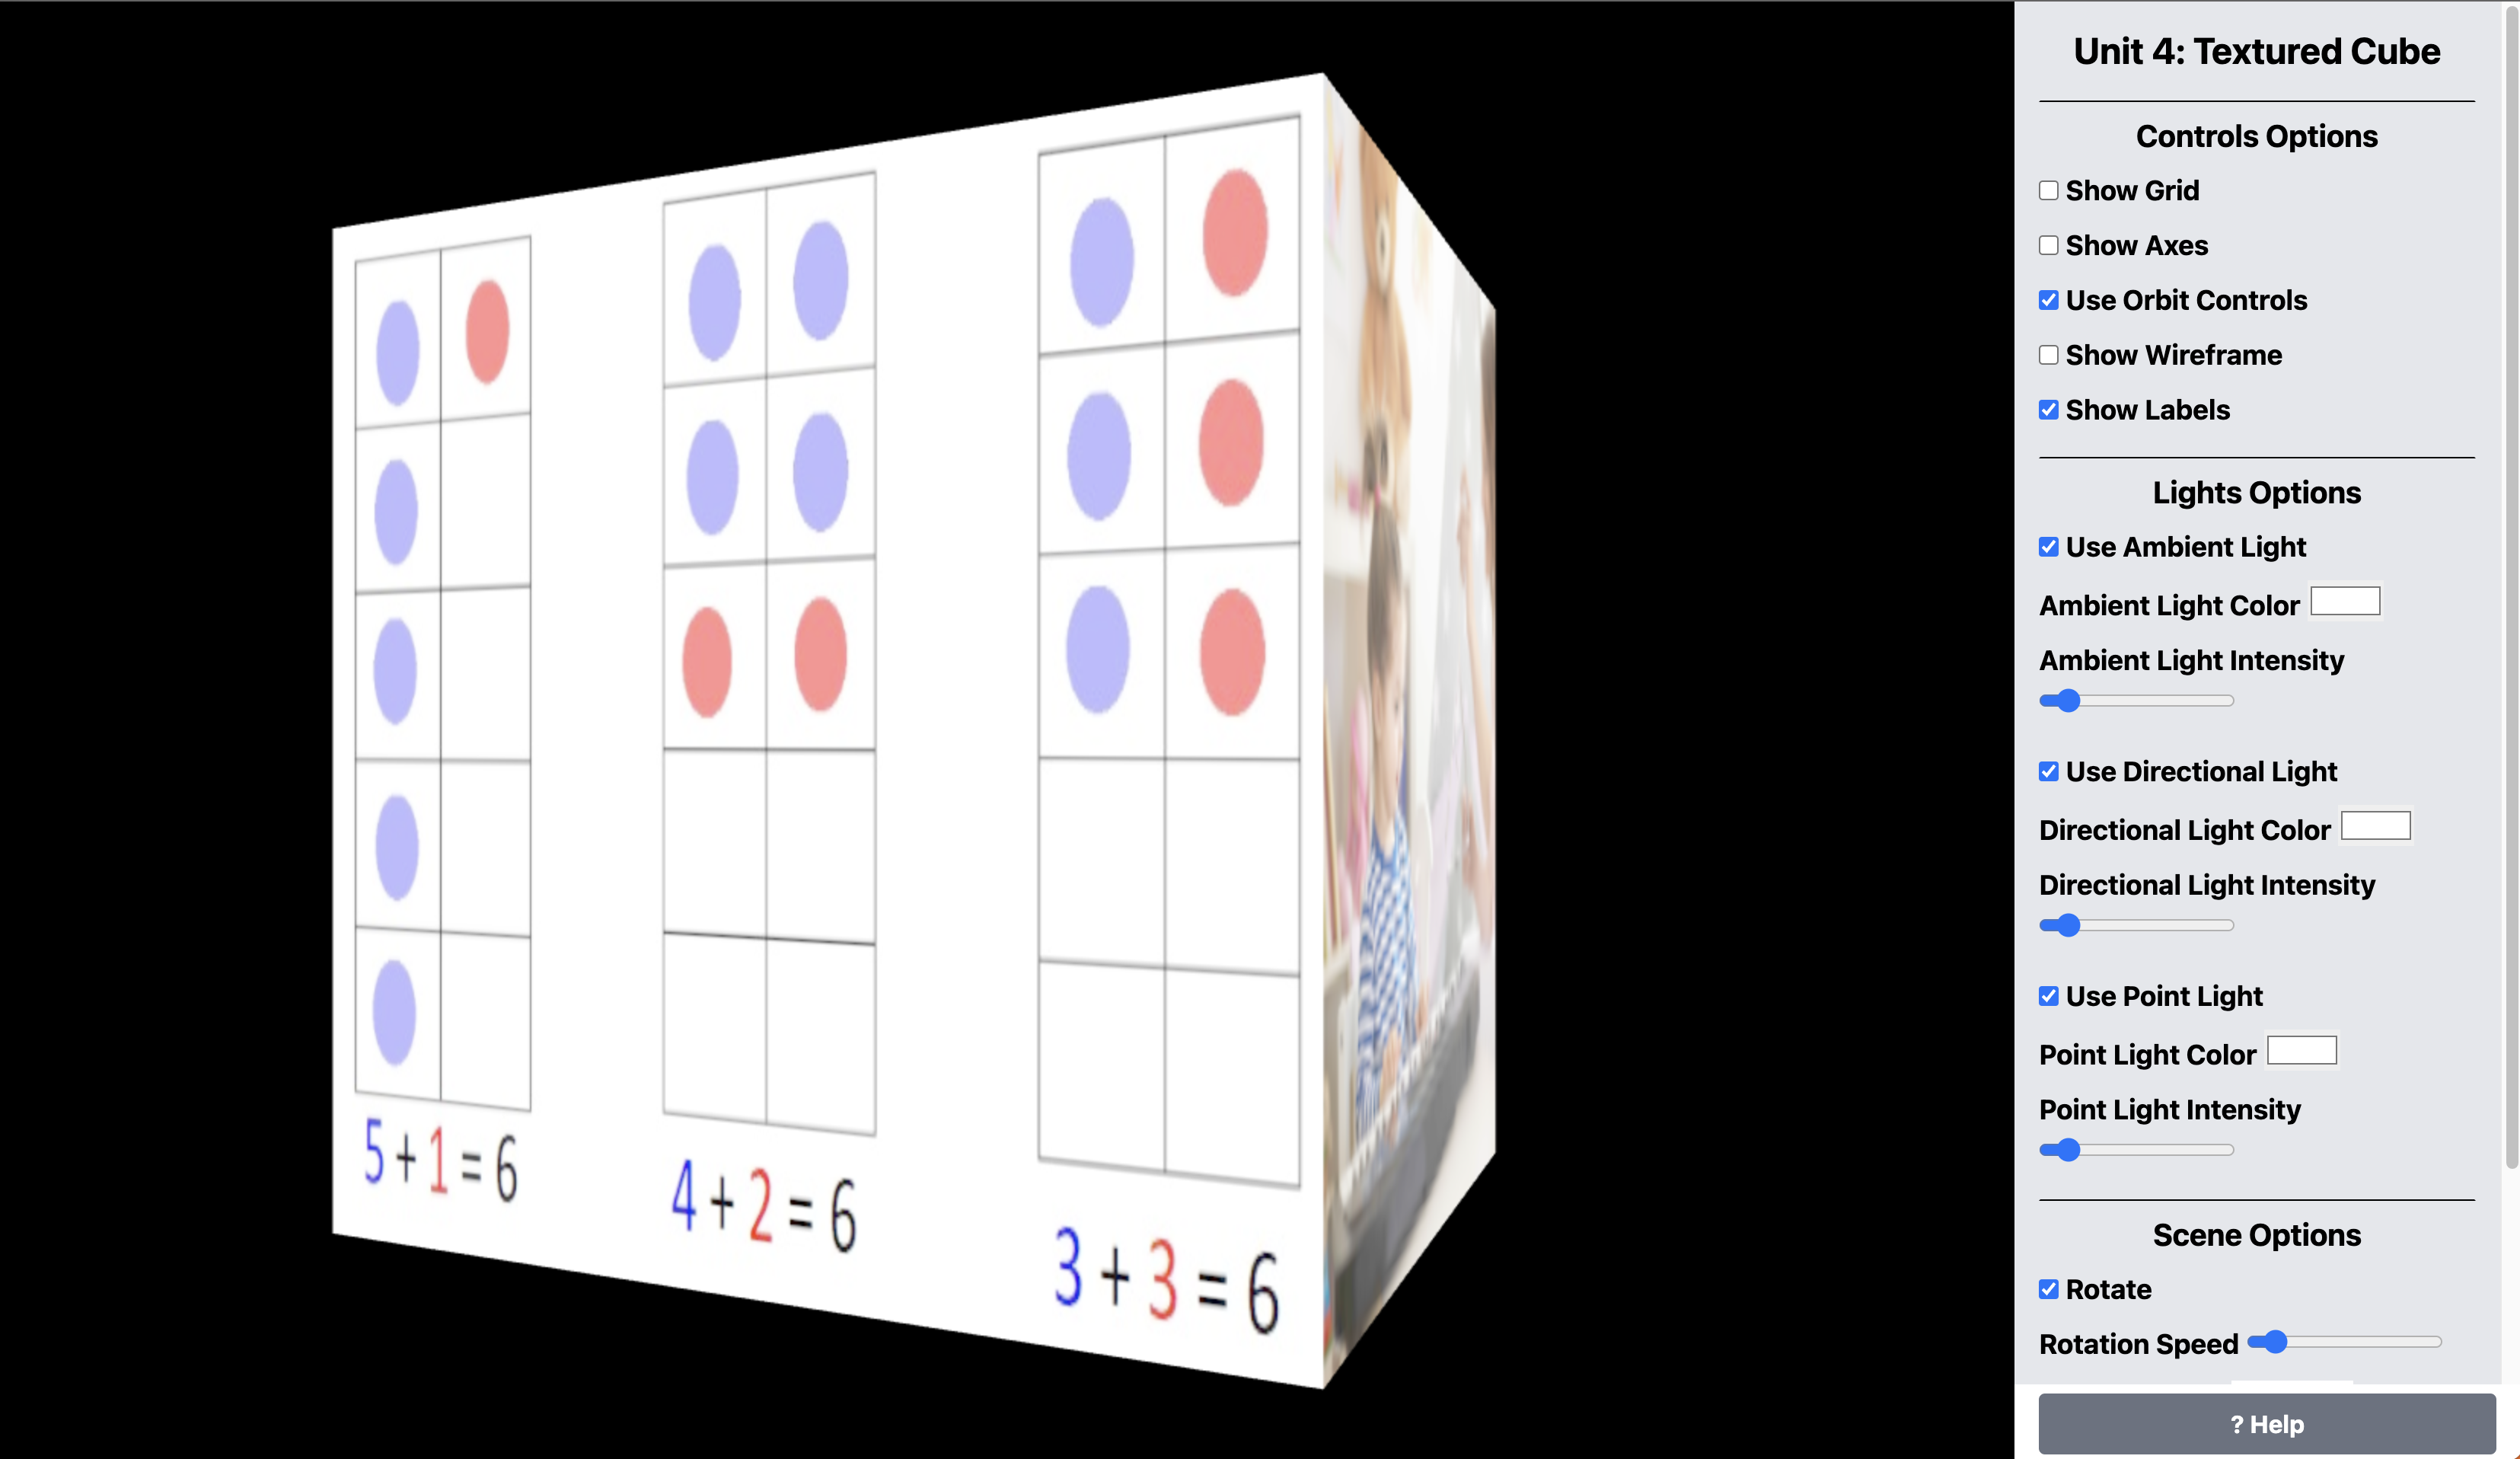 |
| Image 3: screenshot of the scene |
|---|
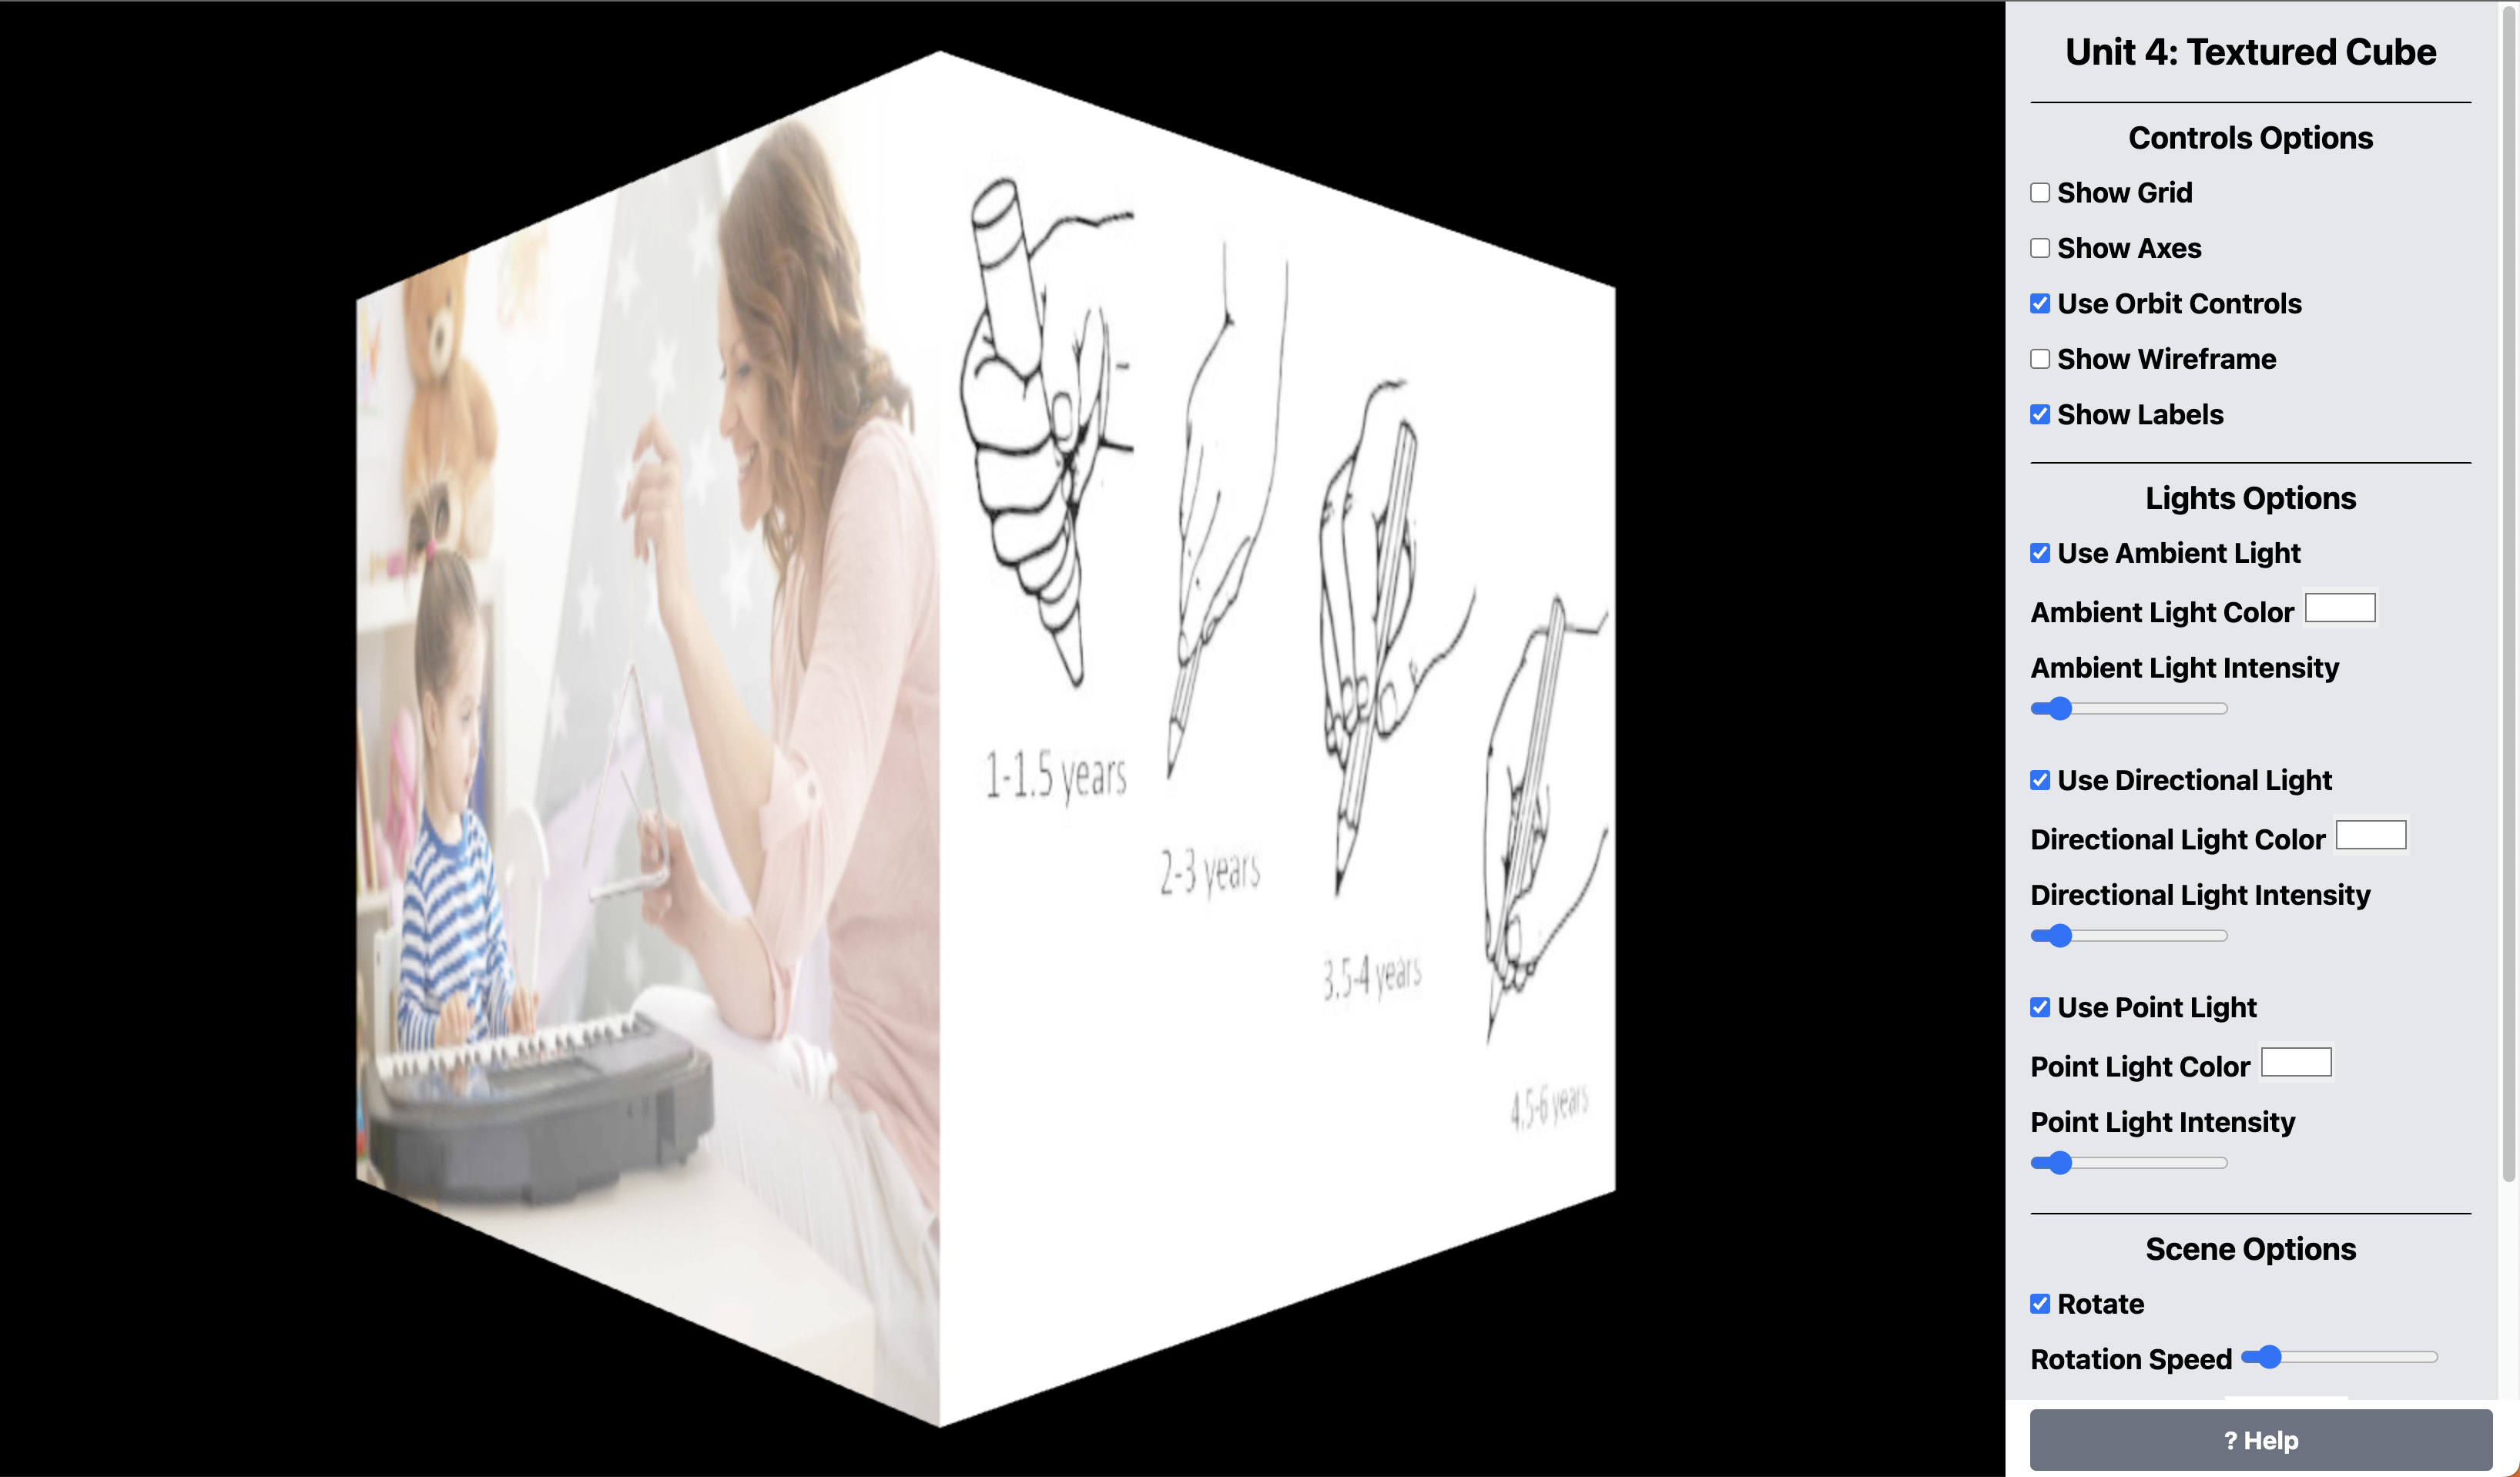 |
Code
I will include the code for the basic scene setup to save space; however, the full code is here: https://github.com/ahmad-ali14/AY2025-T2-CS4406/blob/main/src/unit4/code.ts
The code below is the basic code for creating the cube and adding the textures to it and auto rotating it. The parts that create the options panel and the event listeners are included in the createBaseScene function, which I use for all my assignments.
import * as THREE from "three";
import { createBaseScene } from "../utils/createBaseScene";

const { render, scene } = createBaseScene({
    sceneTitle: "Unit 4: Textured Cube",
    cameraZ: window.innerHeight,
    defaultLightColor: "#ffffff",
    showAxes: false,
    showGrid: false,
});

const w = window.innerHeight / 2;
const cubeGeometry = new THREE.BoxGeometry(w, w, w);

// put an image on each face of the cube
const cubeMaterials = [
    // right side
    new THREE.MeshBasicMaterial({
        map: new THREE.TextureLoader().load("./images/1.jpg"),
    }),
    // left side
    new THREE.MeshBasicMaterial({
        map: new THREE.TextureLoader().load("./images/2.jpg"),
    }),
    // top side
    new THREE.MeshBasicMaterial({ color: 0x00ff00 }),
    // bottom side
    new THREE.MeshBasicMaterial({ color: 0xff0000 }),
    // front side
    new THREE.MeshBasicMaterial({
        map: new THREE.TextureLoader().load("./images/3.jpeg"),
    }),
    // back side
    new THREE.MeshBasicMaterial({
        map: new THREE.TextureLoader().load("./images/4.jpg"),
    }),
];

const cube = new THREE.Mesh(cubeGeometry, cubeMaterials);
scene.add(cube);

let ySpeed = 0.01;
let yDirection = 1;

const animate = () => {
    requestAnimationFrame(animate); // prepare for the next frame

    cube.rotation.y += ySpeed * yDirection; // rotate the cube on the y-axis

    render(); // re-render the scene
};

animate();
Code Explanation
- The
createBaseScenefunction is used to create the basic scene setup. It returns many variables to the caller, including render, renderer, scene, camera, controls, lights, and other GUI helpers. - I use
createBaseScenein all my assignments to avoid repeating the same code. It initializes the scene, camera, renderer, and other necessary components; and returns them to the caller. - We start by creating a cube geometry with a width, height, and depth of
window.innerHeight / 2; the user can control from the Options Panel. - Then we create an array of 6
BasicMeshMaterialobjects ordered according to the default cube faces order[right, left, top, bottom, front, back]. - We then instantiate a
THREE.Meshobject with the cube geometry and the materials array; and add it to the scene. - We animate the cube by adding a
ySpeedvalue to the currentyof the cube on each frame.
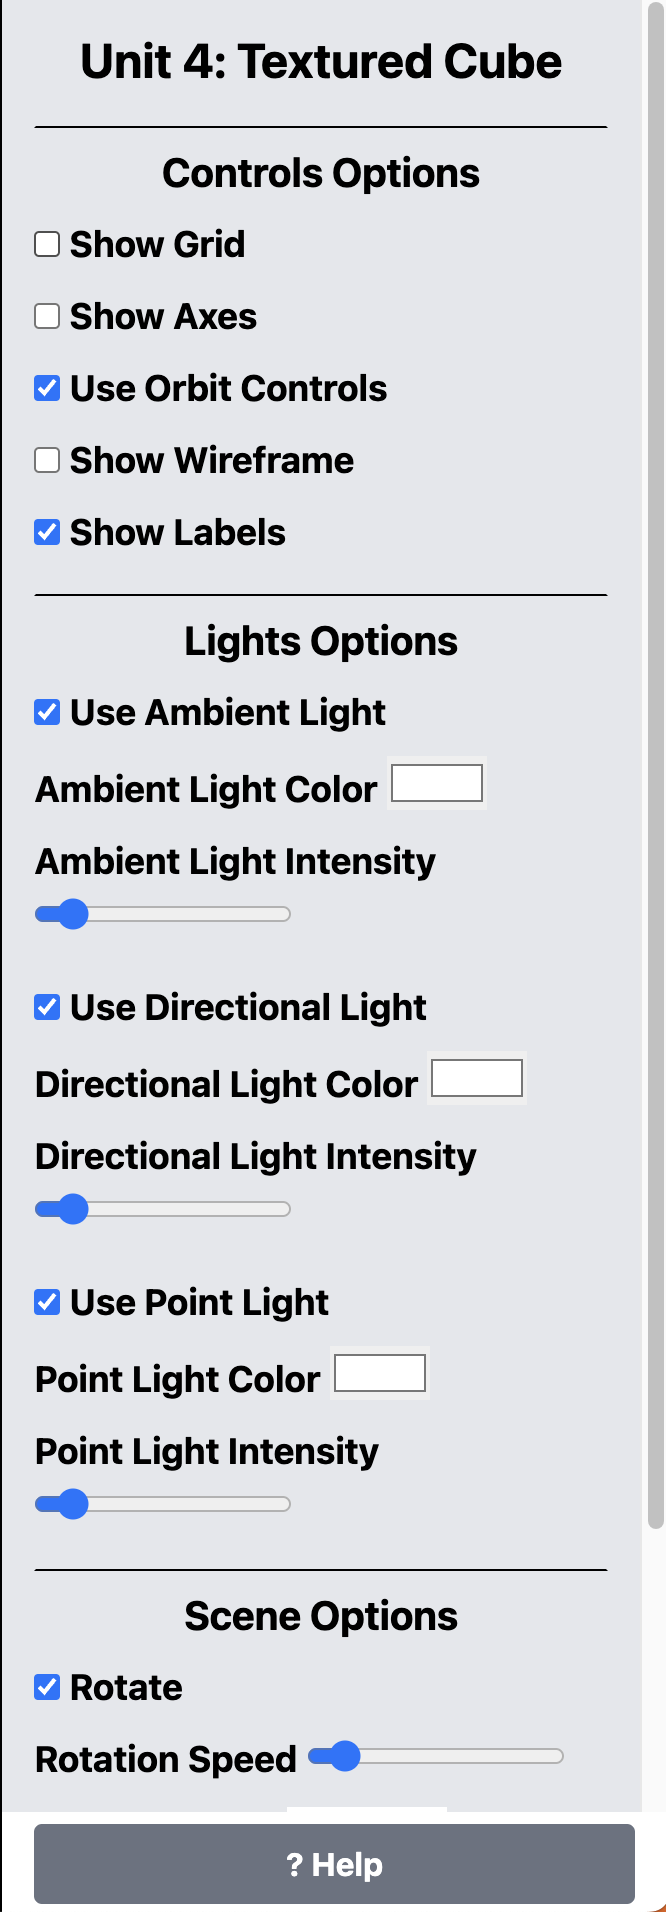
Options Panel
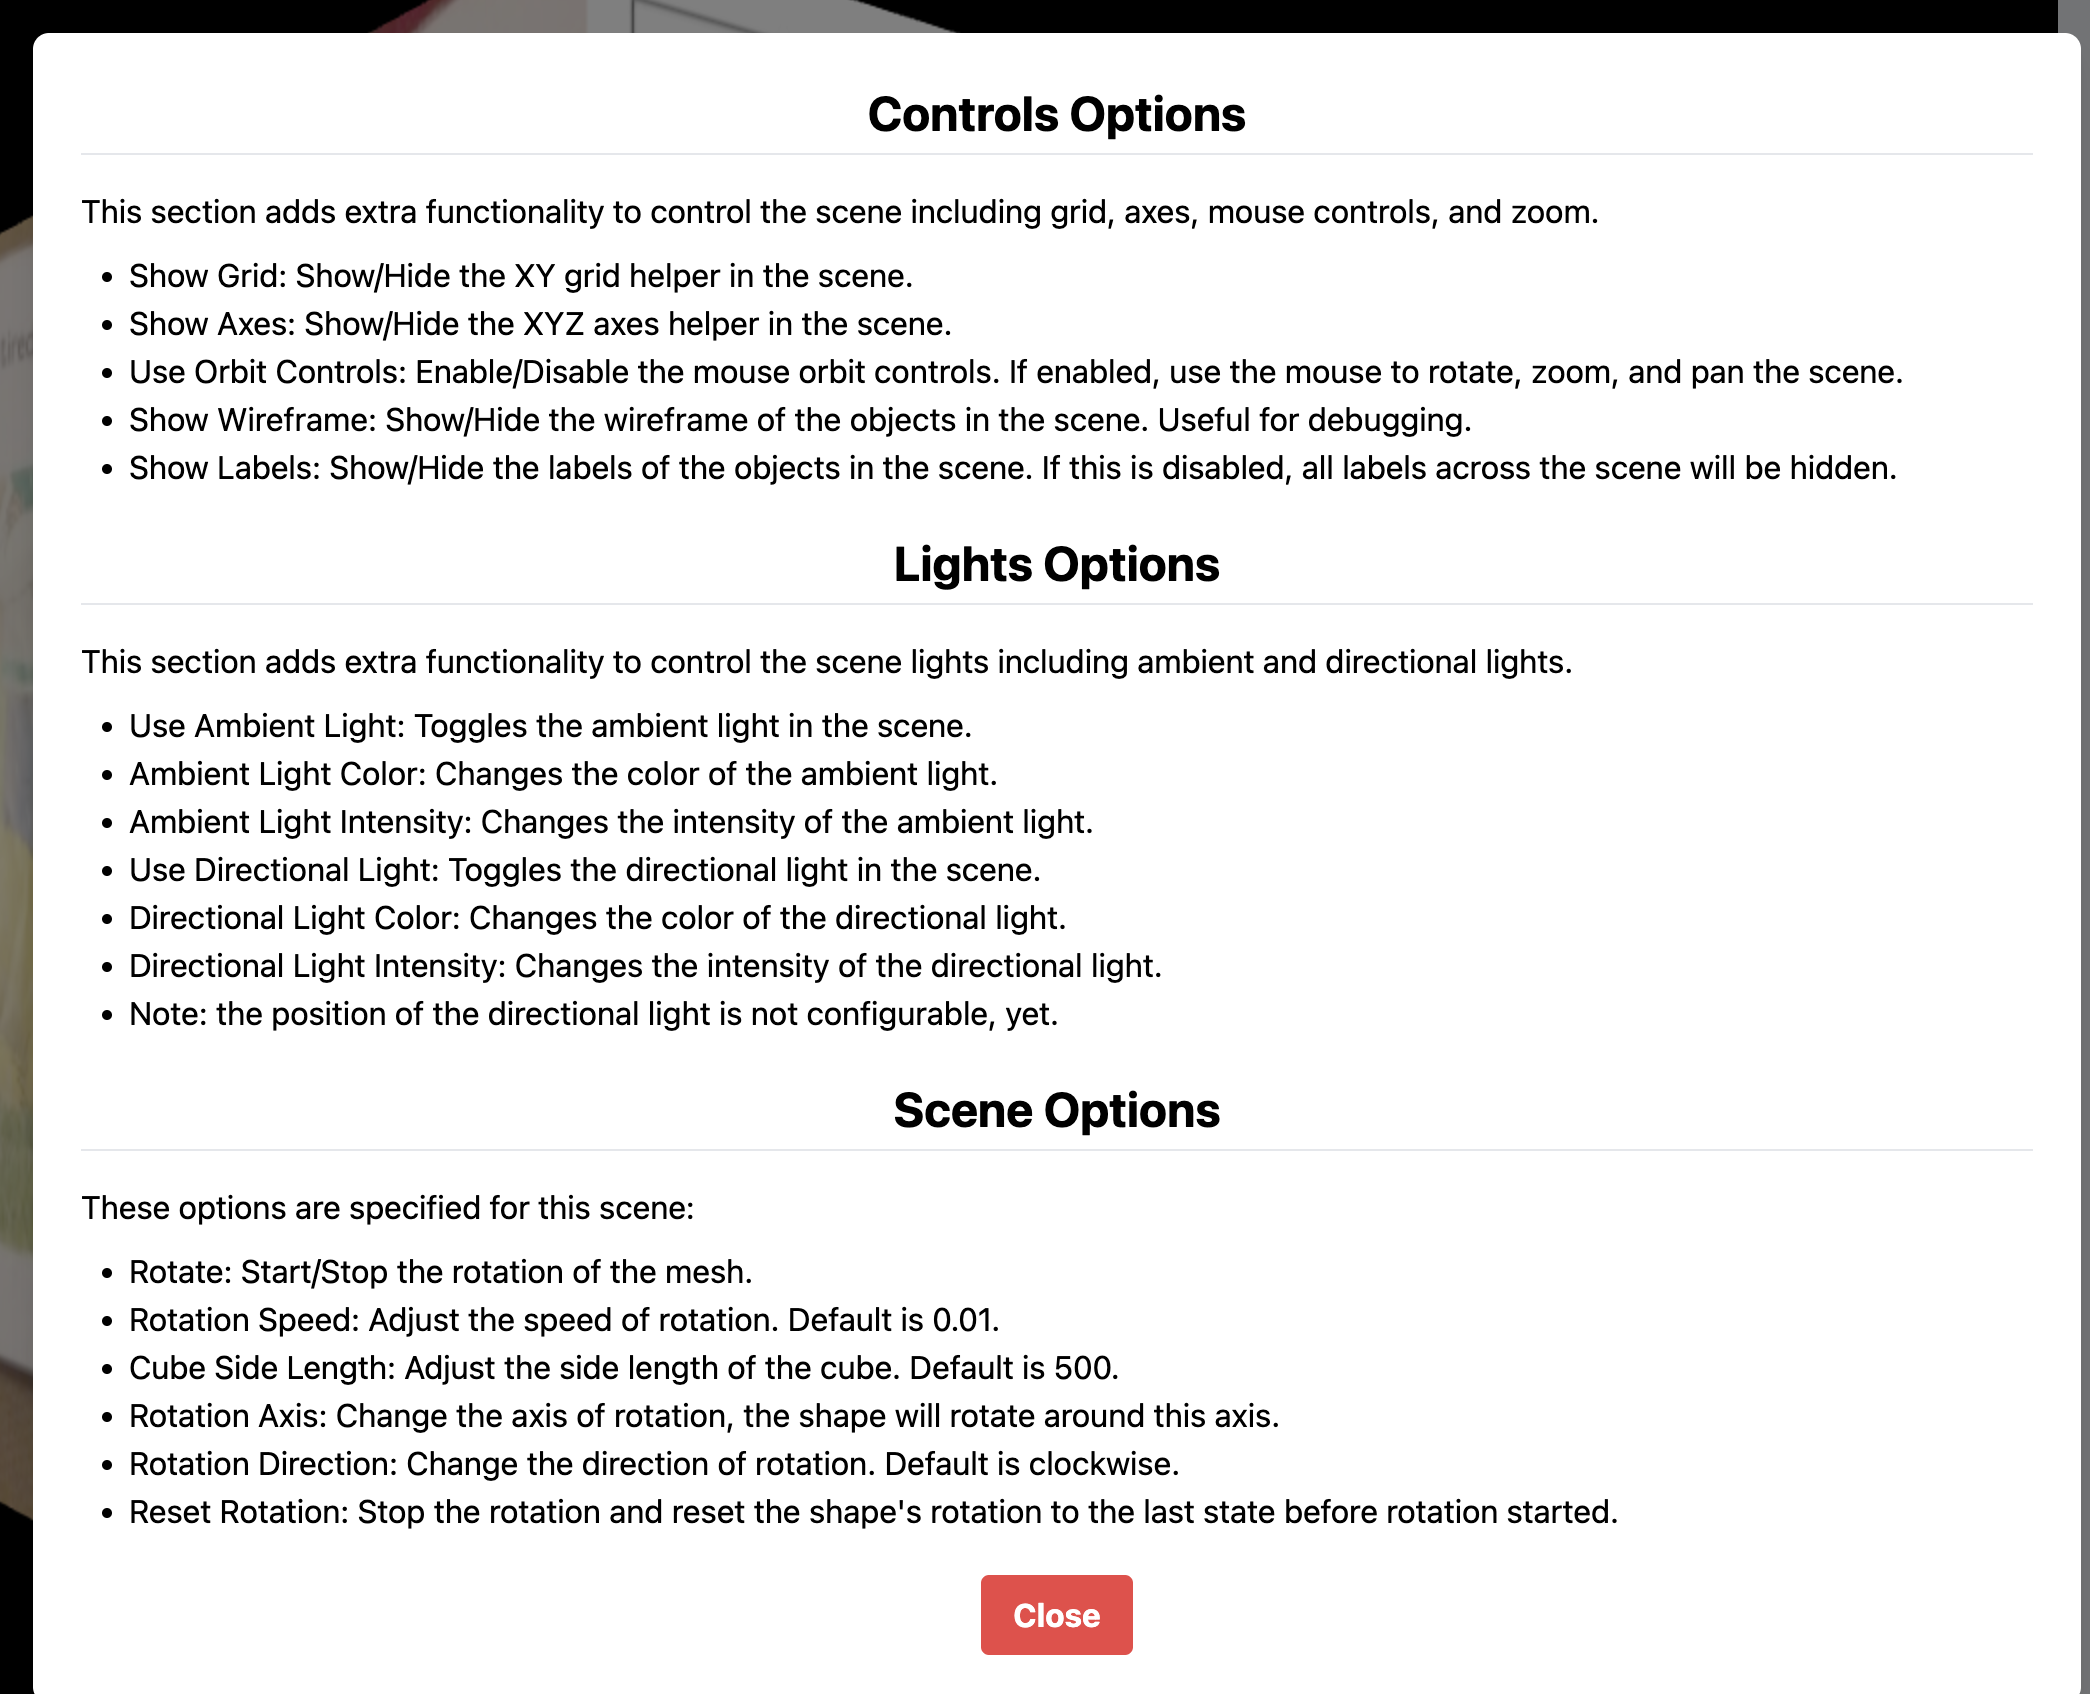
The Options Panel is a GUI panel lies on the right side of the screen. It contains the following options (see images 4 and 5 below), and the explanation of each option is as follows (Image 6)and can be displayed by clicking the Help button at https://ahmad-ali14.github.io/AY2025-T2-CS4406/unit4/:
| Image 4: Options Panel 1 |
|---|
 |
| Image 5: Options Panel 2 |
|---|
 |
| Image 6: Explanation of available options |
|---|
 |
Conclusion
| - | Link |
|---|---|
| Live demo | https://ahmad-ali14.github.io/AY2025-T2-CS4406/unit4/ |
| Source code | https://github.com/ahmad-ali14/AY2025-T2-CS4406/blob/main/src/unit4/code.ts |
References
- Lights. (2024). Lights — Three.js Journey. Three.js Journey. https://threejs-journey.com/lessons/lights#